
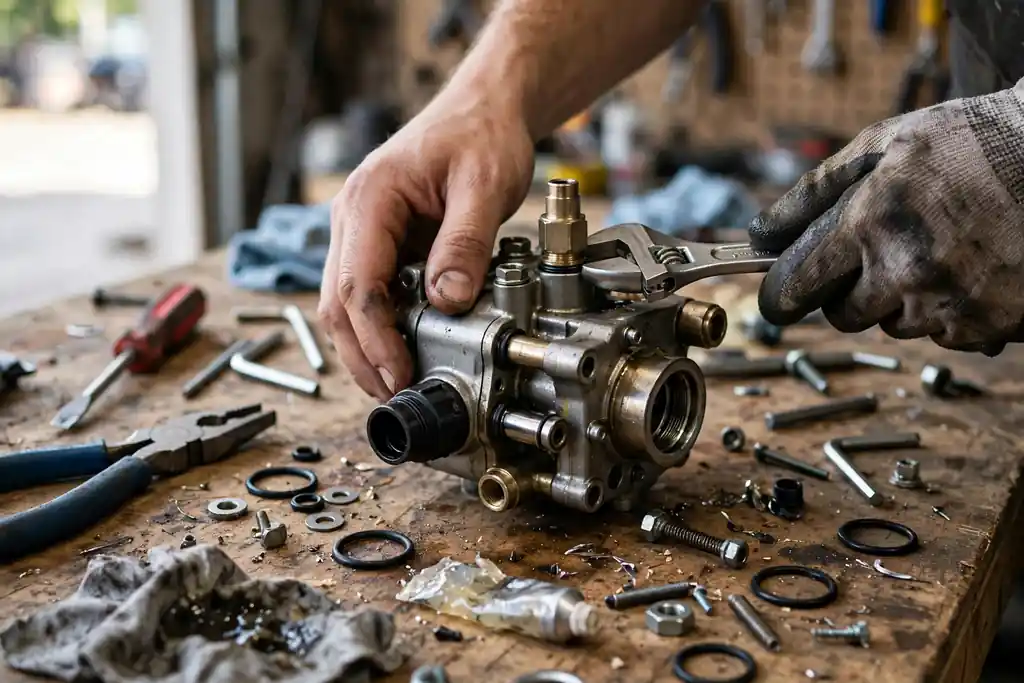
Replacing the pump on a pressure washer is a straightforward repair that most homeowners and contractors can complete in 1 to 3 hours with basic hand tools. The process involves draining fluids, disconnecting the water inlet and outlet fittings, unbolting the old pump from the engine or motor shaft, installing the matched replacement pump, and reconnecting all fittings before testing for leaks and pressure output.
A failed pump does not always mean the entire machine is scrap. Pressure washer pumps are serviceable, replaceable components, and in most cases, replacing the pump costs significantly less than buying a new machine. This guide walks through everything you need to know — from identifying pump failure to completing a successful replacement — covering all major brands, pump types, tools, and common pitfalls.
Understanding the Pressure Washer Pump and Why It Fails
The pressure washer pump is the heart of the machine. It is a positive displacement pump that draws water from a connected supply line and forces it out through a narrow orifice at high pressure. Unlike a centrifugal pump used in irrigation, a pressure washer pump builds pressure by physically trapping and compressing a fixed volume of water with each stroke or rotation.
There are two dominant pump designs used in pressure washers: the axial cam pump and the triplex plunger pump. Understanding which one your machine has affects how you approach the replacement and what replacement options are available to you.
Axial Cam Pump vs. Triplex Plunger Pump
An axial cam pump uses pistons arranged at an angle around a central rotating cam or wobble plate. As the cam rotates, it pushes each piston in and out sequentially, creating pressure. These pumps are compact, lightweight, and inexpensive to manufacture. They are standard on entry-level and mid-range residential pressure washers from brands like Sun Joe, Ryobi, Greenworks, and lower-tier Karcher models. The tradeoff is service life — axial cam pumps typically last 200 to 500 operating hours before significant wear occurs.
A triplex plunger pump uses three horizontal ceramic or stainless steel plungers driven by a crankshaft. Each plunger pulls water in through an inlet check valve and forces it out through an outlet check valve in alternating strokes. The three-piston design produces smoother, more consistent pressure with less vibration. These pumps handle higher duty cycles and last 500 to 1,000+ hours with proper maintenance. They are found on professional-grade and commercial pressure washers from brands like Simpson, General Pump, AR Pumps (Annovi Reverberi), Cat Pumps, Giant Industries, and Comet Pumps.
Common Reasons a Pressure Washer Pump Fails
Recognizing why the pump failed informs whether a simple replacement is sufficient or whether an underlying issue needs to be corrected first:
- Cavitation damage: Occurs when the water supply cannot keep up with the pump’s demand, creating vapor bubbles that implode and erode internal surfaces. Usually caused by a kinked inlet hose, clogged inlet screen, or insufficient water supply pressure.
- Running dry (thermal bypass failure): Operating the pump with no water flow causes rapid heat buildup. The thermal relief valve is designed to release hot water and protect the pump, but repeated dry runs destroy pump seals, O-rings, and valve seats.
- Freezing damage: Water left in the pump during below-freezing storage expands as it freezes, cracking the pump manifold, cylinder head, or pump housing. A cracked manifold is typically non-repairable and requires full pump replacement.
- Seal and O-ring degradation: Over time, high-pressure seals, low-pressure seals, and O-rings in the pump wear out from friction and chemical exposure. This causes visible water leaks from the pump body or loss of pressure. In many cases, a pump seal kit can restore function without full replacement.
- Valve wear: Check valves (inlet and outlet) are spring-loaded ball or poppet valves. Mineral deposits, debris, or wear cause them to seat improperly, resulting in pressure loss and pulsation.
- Oil contamination: Many triplex pumps have a dedicated pump oil reservoir. Using incorrect oil, neglecting oil changes, or water intrusion into the oil gallery causes bearing and connecting rod failure.
Tools and Materials Required for Pump Replacement
Gathering everything before starting prevents mid-job interruptions. Here is a complete checklist:
Tools needed:
- Socket wrench set (metric and SAE, typically 8mm through 19mm)
- Torque wrench (for reassembly to manufacturer specifications)
- Adjustable wrench or pipe wrench (for inlet and outlet fittings)
- Flathead and Phillips screwdrivers
- Allen key / hex key set
- Strap wrench (useful for removing threaded hose connections without slipping)
- Thread seal tape (PTFE tape / Teflon tape)
- Oil drain pan
- Shop rags and nitrile gloves
- Wire brush (for cleaning mounting surfaces)
- Digital caliper (optional, for verifying shaft diameter)
Materials needed:
- Replacement pump (matched to your machine’s specifications — see selection guide below)
- Pump oil (SAE 30 non-detergent oil or manufacturer-specified pump oil — do not use motor oil)
- Replacement O-rings and gaskets (often included with new pump or available as a kit)
- Thread sealant or PTFE tape for inlet and outlet fittings
- Pump coupler or key (if your pump uses a keyed shaft connection)
How to Select the Correct Replacement Pump
This step is critical and often where people make expensive mistakes. Installing a pump with the wrong specifications damages the engine, fails immediately, or produces incorrect pressure.
Matching Pump Specifications to Your Machine
The replacement pump must match the following parameters of your existing machine:
PSI rating: The pump’s maximum rated PSI (pounds per square inch) must be equal to or higher than your machine’s rated output. Installing a pump rated below the engine’s output causes premature pump failure.
GPM rating: The GPM (gallons per minute) must match the engine’s or motor’s output capacity. A pump that demands more GPM than the engine can drive will underperform. A pump with a lower GPM rating than the engine can handle wastes engine capacity.
Shaft diameter and type: This is the most mechanically critical parameter. The pump must fit the output shaft of your engine or motor. Common shaft diameters include 3/4 inch, 7/8 inch, and 1 inch for gas engines. Electric motors typically use 14mm or 5/8 inch shafts. Measure the existing shaft before ordering.
Shaft connection type: Pumps connect to shafts via direct drive (pump slides directly onto the engine shaft) or belt drive (a pulley system connects engine to pump). Direct drive pumps must match shaft diameter precisely. Belt drive setups have more flexibility but require the correct pulley specifications.
Mounting bolt pattern: The replacement pump must have a compatible mounting flange and bolt pattern to attach to the machine’s frame or engine. Some pumps are universal-mount; others are machine-specific.
Recommended Replacement Pump Brands
- AR Pumps (Annovi Reverberi): Italian-manufactured, widely regarded as one of the best value triplex pumps for both residential and commercial use. AR Blue Clean, AR North America models are popular direct-drop-in replacements.
- General Pump: A premium American brand offering triplex plunger pumps with excellent durability and broad compatibility with Simpson, Generac, and Briggs & Stratton platforms.
- Cat Pumps: The highest-end category, used in ultra-heavy-duty industrial and commercial applications. Exceptionally long service life but priced accordingly.
- Comet Pumps: Italian-made, with strong representation in the professional contractor market. Compatible with many major frame designs.
- Karcher Genuine Replacement Pumps: For Karcher machines specifically, OEM (original equipment manufacturer) replacement pumps ensure guaranteed compatibility.
- Simpson OEM Pumps: Simpson uses AAA and General Pump branded triplex pumps in most of their professional series machines.
- Briggs & Stratton Replacement Pumps: For machines powered by Briggs engines, the pump assemblies are often designed as matched units.
Step-by-Step Guide: How to Replace a Pump on a Pressure Washer
This procedure applies to both gas-powered and electric pressure washers. Where the steps differ by machine type, both versions are noted.
Step 1: Safety First — Disconnect All Power and Depressurize the System
Before touching any component, ensure the machine is completely safe to work on.
For gas pressure washers: Turn off the engine, allow it to cool for at least 20 minutes, then disconnect the spark plug wire by pulling it off the spark plug tip. This prevents accidental engine starts.
For electric pressure washers: Unplug the power cord from the wall outlet. Do not rely solely on the power switch — always physically disconnect from the power source.
After the machine is off, squeeze the trigger gun several times to release any residual pressure trapped in the high-pressure hose and pump. You should hear a hiss as pressurized water releases. This step prevents water from spraying forcefully when you disconnect fittings.
Step 2: Drain All Water and Oil from the Pump
Position an oil drain pan under the pump. If the pump has a drain plug on the bottom of the manifold, open it to let water drain fully. For triplex pumps with an oil reservoir, remove the oil fill cap and dipstick, then tilt the machine or open the drain bolt to empty the pump oil.
Disconnect the garden hose or water supply line from the pump’s water inlet fitting. Allow any remaining water to drain by gravity. Disconnect the high-pressure outlet hose from the pump’s outlet fitting. Use an adjustable wrench or the appropriately sized socket to avoid rounding off the fitting.
Step 3: Remove the High-Pressure Outlet and Inlet Fittings
Before removing the pump from the machine, remove any fittings that will transfer to the new pump. This includes:
- The inlet filter screen assembly (a small mesh filter inside the water inlet port — always clean or replace this when doing a pump swap)
- The unloader valve assembly (if it is mounted directly to the pump manifold — on many machines it is)
- The chemical injector fitting (if present on the pump body)
- The thermal relief valve (a small brass valve, usually on the pump side — transfer this to the new pump)
Wrap all threaded fittings with fresh PTFE tape before reinstalling them on the new pump. Reusing old thread sealant is a common cause of post-replacement leaks.
Step 4: Unbolt the Old Pump from the Engine or Motor
Locate the mounting bolts that secure the pump to the engine crankcase (direct drive) or to the machine frame (belt drive). These are typically 3 or 4 bolts arranged around the pump face or mounting flange.
For direct drive configurations: The pump slides directly onto the engine shaft. After removing the mounting bolts, the pump should slide off the shaft. If it is stuck due to corrosion or mineral buildup, gently work it free by rocking side to side. Do not use a pry bar directly on the pump manifold as it can crack aluminum housings.
For belt drive configurations: Remove the drive belt first by loosening the belt tension adjuster. Then remove the pulley from the pump shaft (usually held by a set screw or a keyway bolt). Once the belt and pulley are removed, unbolt the pump from its mounting bracket.
Note the orientation of the pump as you remove it — specifically which side the inlet faces, which side the outlet faces, and where the oil fill port is positioned. Take a photo before removal as a reference.
Step 5: Prepare the New Pump for Installation
Before mounting the new pump, complete these preparation steps:
Fill the pump oil reservoir to the correct level as indicated on the dipstick or sight glass. Use only SAE 30 non-detergent pump oil or the oil specified in the replacement pump’s documentation. Do not overfill — overfilling causes oil to bypass into the water section.
Inspect the engine shaft for rust, wear, or damage. Light surface rust can be cleaned with emery cloth. Ensure the keyway (a small rectangular slot on the shaft) is clean and the key (a small rectangular metal piece that locks the pump to the shaft) is present and undamaged.
Apply a light coat of anti-seize compound to the engine shaft before sliding on the new pump. This prevents the shaft from corroding into the pump hub and makes future removal much easier — a step that most people skip and regret at the next service interval.
Step 6: Mount the New Pump
Align the pump hub with the engine shaft and slide the pump on carefully, ensuring the keyway aligns with the key. The pump should slide on smoothly without forcing. If resistance is encountered, recheck shaft and hub alignment.
Thread the mounting bolts by hand first to ensure they are not cross-threaded. Then tighten them in a cross pattern (tighten one bolt partially, then the opposite bolt, working around the pattern) to ensure even seating against the engine face. Use a torque wrench to achieve the manufacturer-specified torque value — typically 15 to 25 ft-lbs for most residential and professional models, but always verify in the pump’s documentation.
For belt drive setups, reinstall the pulley on the new pump shaft, ensuring the key and set screw are properly secured. Reinstall the belt and adjust tension so the belt deflects approximately 1/2 inch under light finger pressure at the midpoint between pulleys.
Step 7: Reinstall All Fittings and Connections
Reinstall the unloader valve, thermal relief valve, inlet filter, and any chemical injector fittings onto the new pump using fresh PTFE tape on all threaded connections. Hand-tighten first, then snug with a wrench — do not overtighten brass fittings into aluminum manifolds as this strips threads easily.
Reconnect the water inlet supply hose. Reconnect the high-pressure outlet hose. Ensure all hose connections are fully seated and the quick-connect fittings (if present) are locked.
Step 8: Prime and Test the New Pump
Before starting the engine or plugging in the electric motor, prime the pump to fill it with water. Connect the garden hose to the water inlet, turn on the water supply fully, and squeeze the trigger gun until a steady stream of water (with no air sputtering) exits the nozzle. This ensures no air pockets remain in the pump — starting a pump with trapped air causes cavitation damage immediately.
For gas pressure washers: Reconnect the spark plug wire. Start the engine per the normal cold-start procedure. Allow the machine to run at idle (if adjustable) for 30 seconds before engaging full throttle. Spray water through the trigger gun and check for leaks at all fitting connections.
For electric pressure washers: Plug in and turn on. Engage the trigger immediately as electric motors should not run unloaded for extended periods.
Check every fitting and connection point for leaks under pressure. A small drip is often resolved by snugging the fitting slightly. A steady leak may require PTFE tape reapplication.
Verify the output pressure with a pressure gauge if available, or simply confirm that the spray pattern and cutting force matches the machine’s rated specifications. If pressure is significantly lower than expected, check that the unloader valve is set correctly — a misadjusted unloader is the most common cause of low pressure after pump replacement.
Pressure Washer Pump Replacement vs. Pump Repair: Comparison Table
| Consideration | Full Pump Replacement | Pump Repair (Rebuild Kit) |
|---|---|---|
| Best For | Cracked manifold, worn plungers, major failure | Leaking seals, worn O-rings, valve issues |
| Average Cost | $80–$400 (pump cost) | $15–$60 (seal/rebuild kit cost) |
| Skill Level Required | Beginner to intermediate | Intermediate to advanced |
| Time Required | 1–3 hours | 2–5 hours |
| Parts Involved | Complete pump assembly | Seals, O-rings, check valves, pistons |
| Result | Like-new performance (if matched correctly) | Restored performance if internal parts are sound |
| Risk of Failure | Low (new components) | Moderate (depends on additional wear) |
| Recommended When | Pump is over 3 years old or heavily worn | Pump is relatively new with isolated failure |
| Popular Rebuild Kits | Not applicable | AR Pump seal kits, General Pump rebuild kits |
| Long-term Value | High (extends machine life significantly) | Good for newer machines, limited on older ones |
Benefits of Replacing the Pump Instead of Buying a New Machine
Many people default to purchasing a new pressure washer when the pump fails, but pump replacement is almost always the more economical and environmentally sound decision when the engine or motor is still in good condition.
Cost savings: A new residential pressure washer costs $200–$800. A replacement pump for the same machine costs $80–$250 and extends the service life by several more years.
Engine value preservation: A quality Honda GX200 or GX390 engine, or a Briggs & Stratton 190cc engine, can last 10 to 15 years with proper maintenance. Pairing a fresh pump with a proven engine produces a machine that often outperforms new budget models with inferior engines.
Environmental benefit: Disposing of an entire machine because the pump wore out is wasteful. Replacing only the failed component reduces landfill contribution and conserves the manufacturing energy embedded in the functional parts of the machine.
Performance customization: Pump replacement is also an opportunity to upgrade performance. A homeowner with an axial cam pump machine can often upgrade to a triplex plunger pump if the engine horsepower supports the higher flow demand, resulting in better durability and more consistent pressure.
Faster return to service: Ordering a pump and completing the replacement typically takes less time than researching, purchasing, receiving, and assembling a new machine.
Common Mistakes When Replacing a Pressure Washer Pump
Installing the wrong shaft size: This is the single most common and costly error. A pump that appears to fit loosely on a shaft will vibrate, wear the hub oval, and fail quickly. Always measure the shaft diameter with a digital caliper or vernier caliper before ordering. Do not rely solely on the machine’s model number as engine and pump combinations sometimes vary within the same model run.
Forgetting to fill pump oil before starting: Running a new triplex pump without oil for even 30 seconds causes immediate bearing and plunger damage. Always fill the oil reservoir before the first start.
Cross-threading inlet and outlet fittings: Aluminum manifolds strip easily. Always start all threaded fittings by hand until fully seated before applying wrench torque.
Skipping the priming step: Starting an electric motor or gasoline engine with a dry pump causes cavitation damage to the new pump immediately. Always prime with water before the first start.
Not replacing the inlet filter: The inlet filter screen is inexpensive, easy to replace, and directly responsible for keeping debris out of the new pump. Skipping this step during pump replacement is a missed maintenance opportunity that leads to premature valve wear.
Reusing old PTFE tape: Old thread sealant on fittings does not seal reliably. Always apply fresh PTFE tape to all threaded connections during reassembly.
Not checking the unloader valve after replacement: The unloader valve controls how the pump handles pressure when the trigger is released. If the unloader valve is worn, incorrectly set, or damaged, the new pump will experience continuous high-pressure cycling that shortens its life. Inspect and adjust or replace the unloader valve at the same time as the pump replacement whenever practical.
Using automotive motor oil in the pump: Standard 10W-30 or 5W-30 motor oil is formulated with detergent additives that foam under the pressure washer pump’s operating conditions. Always use SAE 30 non-detergent pump oil or the oil specifically listed in the pump’s documentation.
Frequently Asked Questions
How to replace pump on pressure washer without professional help?
Replacing a pressure washer pump without professional help is entirely achievable for anyone comfortable with basic mechanical work. The most important preparation steps are identifying the correct replacement pump model matched to your machine’s PSI, GPM, shaft diameter, and mounting bolt pattern, gathering the right tools including a socket set, torque wrench, and PTFE tape, and following the proper sequence of disconnecting power, draining fluids, removing old fittings, unbolting the pump, mounting the new pump, and priming before startup. Most residential pump replacements take between 1 and 2 hours without professional tools or expertise.
How to replace pump on pressure washer when the shaft is corroded or stuck?
When the pressure washer pump is stuck on the engine shaft due to corrosion or galvanic bonding, apply penetrating oil (PB Blaster or WD-40) generously around the shaft-to-hub interface and allow it to soak for 15 to 30 minutes. Then rock the pump gently side to side while pulling outward. If still stuck, use a gear puller tool designed for pump removal — place the arms of the puller around the pump hub and turn the center bolt to apply even extraction force. Never strike the pump housing with a hammer as cracking the manifold destroys any reuse value. After removal, clean the shaft thoroughly with emery cloth and apply anti-seize compound before installing the new pump.
How to replace pump on a gas-powered pressure washer specifically?
Replacing the pump on a gas pressure washer follows the same general steps but has specific safety requirements. Always disconnect the spark plug wire before any disassembly to prevent accidental engine starts. Allow the engine to fully cool before working near it. Gas engines also require checking that the engine crankshaft key and keyway are intact, as these align the pump hub to the shaft. After installation, use the engine’s recoil pull cord or electric starter with the trigger gun already squeezed (to prevent pressure buildup in a dry pump) and run at reduced throttle for the first 60 seconds while checking for leaks.
How to replace a pump on an electric pressure washer?
For an electric pressure washer pump replacement, the process differs primarily in the shaft connection. Electric motor shafts are commonly 14mm, 5/8 inch, or 3/4 inch and often use a threaded bolt through the center to secure the pump rather than a separate retaining bolt. Some electric models use a direct-mount adapter plate that bolts the pump face directly to the motor housing. Always unplug the machine from the 120V outlet before starting. After installing the new pump, plug in and turn on without engaging the trigger first — let the pump prime through the water supply line pressure for 5 to 10 seconds before pulling the trigger.
How to replace pump on pressure washer — what is the average cost?
The total cost of a pressure washer pump replacement depends on whether you do it yourself or hire a small engine repair shop. A DIY pump replacement costs the price of the pump plus basic supplies: replacement pumps range from $80 to $150 for axial cam models and $150 to $400 for triplex plunger models. PTFE tape, pump oil, and inlet filter add approximately $10 to $20. Professional replacement at a small engine shop typically adds $60 to $150 in labor, bringing the total to $200 to $500 depending on pump grade and shop rates. Compared to a new machine purchase of $300 to $800 for an equivalent model, self-replacement provides clear cost advantages.
How to replace pump on pressure washer and know if it solved the problem?
After completing a pressure washer pump replacement, confirm success by running the machine through a full operational test. Connect to a full-flow water supply (standard garden hose fully open), start the machine, and check for full-rated pressure output at the nozzle. If you have a pressure gauge (connectable to the high-pressure outlet), verify the reading matches the machine’s rated PSI. Inspect every connection point — inlet fitting, outlet fitting, unloader valve, thermal relief valve, and chemical injector — for any drip or seep under operating pressure. Absent leaks and with normal pressure output confirmed, the replacement has been successful. Persistent low pressure after replacement most commonly indicates a misadjusted or faulty unloader valve rather than a pump defect.
How to replace pump on pressure washer and extend the new pump’s life?
Extending the service life of a newly installed pressure washer pump requires consistent maintenance practices. Change the pump oil on triplex plunger pumps every 3 months or every 50 hours of operation, whichever comes first. Never operate the pump with a restricted or kinked water inlet as this causes cavitation. Always squeeze the trigger gun to release residual pressure and allow the pump to rest in its unloaded state when the machine is idling between uses. Flush the pump with clean water after using detergents or chemicals to prevent seal degradation. Before winter storage, run pump protector antifreeze solution (such as Pump Armor by AR North America) through the pump and store in a heated space. Clean the inlet filter screen at the start of every season.
How to replace pump on pressure washer — should I upgrade to a triplex pump?
Upgrading from an axial cam pump to a triplex plunger pump during a pump replacement is often worth the additional investment if your machine’s engine produces sufficient horsepower to support the upgrade. As a general guideline, a triplex pump requires approximately 1 horsepower per 1 GPM of flow. A 5.5 HP engine supports a pump flowing up to 5.5 GPM, while a 190cc (5–6 HP equivalent) engine fits comfortably with a 2.5 GPM triplex pump. The upgrade to a triplex pump delivers noticeably longer service life, more consistent pressure, lower operating temperature, and greater resistance to cavitation damage compared to the factory axial cam unit that came with many residential machines.
Conclusion
Replacing the pump on a pressure washer is one of the highest-value repairs you can perform on this equipment. With the correct replacement pump selected by matching PSI rating, GPM rating, shaft diameter, and mounting bolt pattern, and by following the proper sequence of safety shutdown, fluid draining, fitting removal, pump unbolting, new pump installation, and priming before startup, the repair is well within reach for any mechanically inclined person. Brands like AR Pumps, General Pump, Cat Pumps, and Comet offer reliable replacements across all machine types. Avoiding common mistakes like dry starting, wrong oil type, and mismatched shaft sizes ensures the new pump delivers full rated performance and a long service life that justifies the repair over replacement every time.