
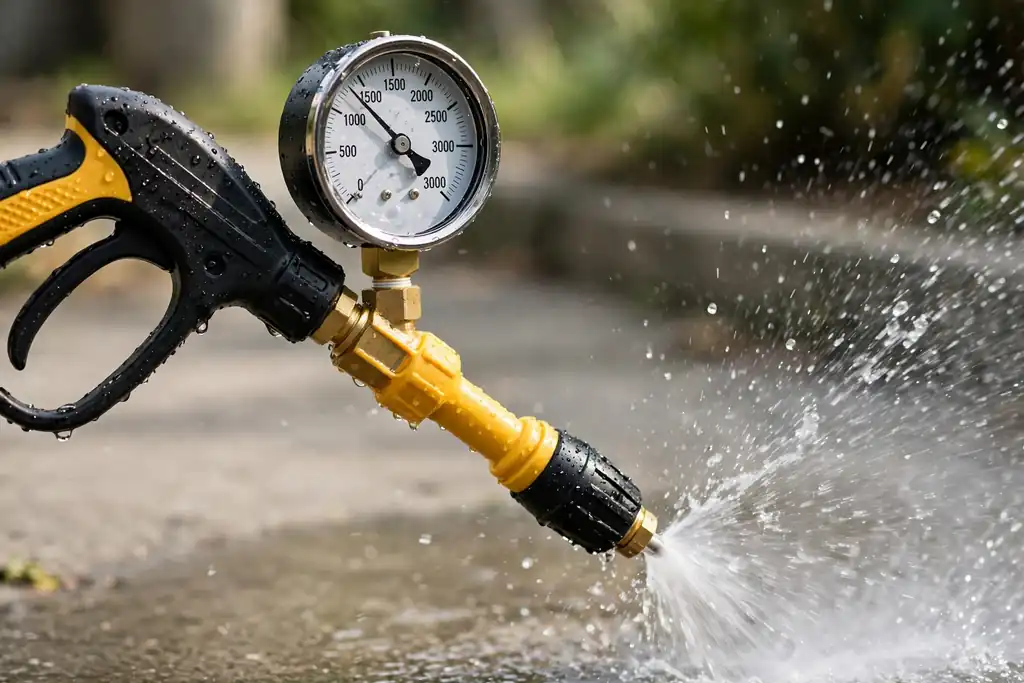
Testing the pressure on a pressure washer involves connecting a pressure gauge to the outlet port or trigger gun inlet, running the machine at full throttle with the trigger engaged, and reading the PSI output against the manufacturer’s rated specification — a reading more than 10–15 percent below the rated PSI confirms a pressure loss problem requiring diagnosis and repair.
Pressure testing a pressure washer is one of the most practical diagnostic skills any owner or technician can develop. When a machine that once blasted concrete clean now struggles to remove pollen from garden furniture, something has changed inside the system — but that “something” could be any one of a dozen components. Without an actual pressure reading, you are guessing. With a verified PSI measurement in hand, you can narrow the fault to a specific component and address it directly, saving time, money, and the frustration of replacing parts that were never actually broken.
This guide walks through every aspect of pressure testing a pressure washer — from understanding what PSI and GPM mean in practice, to the tools required, the exact testing procedure, interpreting your results, and diagnosing the most common causes of pressure loss based on what the gauge actually tells you.
What Does “Testing Pressure” Actually Mean on a Pressure Washer?
Before picking up a gauge, it helps to understand what you are measuring and why the numbers matter. A pressure washer delivers cleaning power through two interdependent measurements: PSI (pounds per square inch), which is the force of the water stream, and GPM (gallons per minute), which is the volume of water being delivered. Multiplied together, these produce Cleaning Units (CU), the most accurate single-number representation of a machine’s total cleaning capability.
When you test the pressure on a pressure washer, you are specifically measuring the output PSI at the point where the spray gun or pressure outlet delivers water to the working surface. This is not the same as the internal pressure generated inside the pump cylinder — it is the net pressure delivered at the working end of the system after accounting for friction losses through the high-pressure hose, quick-connect fittings, and extension wand.
A machine rated at 3,000 PSI by its manufacturer should deliver close to that figure when measured at the spray gun outlet under normal operating conditions. A reading of 2,400 PSI from a 3,000 PSI machine represents a 20 percent pressure deficit — significant enough to meaningfully reduce cleaning performance and signal a problem worth diagnosing. A reading of 1,200 PSI from that same machine is a near-total pressure failure requiring immediate investigation.
The Difference Between Rated PSI and Working PSI
Manufacturers rate their machines at maximum PSI, which is the peak pressure the pump can generate under ideal conditions — clean water supply, correct inlet flow rate, properly sized nozzle, and no downstream restrictions. This is a laboratory figure. Working PSI is what the machine actually delivers in field conditions, which is always somewhat lower due to real-world variables like hose length, inlet water temperature, elevation, and pump wear.
A healthy machine in good condition should deliver 90–95 percent of its rated PSI under normal working conditions. Testing against this benchmark — rather than expecting to hit the exact rated figure — gives you a realistic diagnostic standard.
PSI vs. GPM: Why Both Matter When Diagnosing Pressure Problems
Pressure testing measures PSI, but understanding GPM context is equally important for diagnosis. A pump with worn check valves may maintain adequate GPM while losing PSI. A machine with a restricted inlet supply (undersized garden hose, kinked supply line, or low tap pressure) typically loses GPM first, which the pump then compensates for by reducing output pressure. Knowing which measurement is failing first directs you to the correct component.
For a complete diagnostic picture on commercial or professional machines, a flow meter alongside a pressure gauge gives the full performance profile. For residential diagnosis, a pressure gauge alone is sufficient for most troubleshooting scenarios.
Tools Required to Test Pressure on a Pressure Washer
The right tools make pressure testing accurate, safe, and repeatable. Here is what you need:
Pressure Gauge Options
Inline pressure gauge: The most accurate and commonly used tool for pressure washer testing. An inline pressure gauge (also called a pressure washer test gauge or pump output gauge) connects between the machine’s high-pressure outlet and the spray gun via standard M22 or 3/8-inch NPT fittings. It measures live PSI in real time as the trigger is pulled. This is the correct tool for testing actual working pressure at the delivery point.
0–5,000 PSI glycerin-filled gauge: For most residential and commercial pressure washer testing, a glycerin-filled pressure gauge in the 0–5,000 PSI range with a 1/4-inch NPT male inlet is the professional standard. The glycerin fill dampens needle vibration from pressure pulsation, making the reading stable and readable. Dry gauges without glycerin fill are inexpensive but their needles oscillate too rapidly in pressure washer applications for accurate readings.
Quick-connect pressure gauge kit: Several manufacturers including Briggs & Stratton, Simpson Cleaning, and Karcher sell pressure washer diagnostic gauge kits that include the gauge pre-fitted with quick-connect (QC) adapters compatible with standard pressure washer couplers. These kits simplify connection and are particularly useful for technicians servicing multiple machine brands.
Digital pressure gauge: Digital pressure gauges with an electronic sensor and LCD readout eliminate parallax reading errors and are easier to read at distance during testing. Brands like Dwyer, Ashcroft, and WIKA produce accurate digital gauges in the appropriate pressure range. Battery life and shock resistance in field conditions are the primary drawbacks compared to glycerin-filled analog models.
Additional Testing Tools and Supplies
Beyond the pressure gauge itself, a thorough pressure testing session benefits from:
- Stopwatch or timer: For flow rate estimation if you are also checking GPM
- 5-gallon bucket: For catching and measuring discharge volume to calculate GPM
- Nozzle orifice size chart: To confirm the installed nozzle is the correct size for your machine’s rated flow
- Nozzle orifice gauge set (nozzle drill bit set): For measuring worn nozzle orifice dimensions
- Thread seal tape (PTFE tape): For sealing gauge connections to prevent measurement-affecting leaks at the fitting
- Torque wrench: For tightening gauge fittings to the correct torque without over-tightening and damaging threads
- Manufacturer’s specification sheet: Your machine’s rated PSI and GPM values are the baseline you test against
Understanding Pressure Washer PSI Ratings Before You Test
Context matters enormously when interpreting test results. Pressure washer machines span a wide range of rated output values, and what constitutes “normal” versus “low” pressure varies completely depending on your specific machine type and its design specification.
| Machine Category | Typical PSI Range | Typical GPM Range | Common Use Cases |
|---|---|---|---|
| Light-duty electric | 1,300 – 1,800 PSI | 1.2 – 1.6 GPM | Cars, patio furniture, small decks |
| Medium-duty electric | 1,800 – 2,400 PSI | 1.6 – 2.0 GPM | Siding, fences, driveways |
| Heavy-duty gas | 2,400 – 3,200 PSI | 2.0 – 2.8 GPM | Driveways, stripping, equipment |
| Professional gas | 3,200 – 4,200 PSI | 3.0 – 4.0 GPM | Contractors, commercial cleaning |
| Industrial/commercial | 4,000 – 8,000+ PSI | 4.0 – 8.0+ GPM | Industrial equipment, sandblasting |
Common brands and their typical rated specifications serve as useful reference benchmarks. Sun Joe SPX3000 (electric) is rated at 2,030 PSI / 1.76 GPM. Ryobi RY142300 (electric) is rated at 2,300 PSI / 1.2 GPM. Simpson Cleaning MSH3125 (gas) is rated at 3,200 PSI / 2.5 GPM. Generac 7122 (gas) is rated at 3,100 PSI / 2.5 GPM. Karcher K5 Premium (electric) is rated at 2,000 PSI / 1.4 GPM. These specifications are available on manufacturer websites and owner’s manuals — always locate your specific model’s values before beginning a test.
How to Test the Pressure on a Pressure Washer: Step-by-Step Procedure
The testing procedure varies slightly depending on whether you are using a gas-powered or electric machine, and whether you are connecting the gauge inline or at a test port. The following process covers the complete inline gauge method, which is the most accurate approach for field testing.
Step 1: Locate Your Machine’s Rated Specifications
Before attaching any gauge, find your pressure washer’s rated PSI output, rated GPM, and the recommended nozzle orifice size in the owner’s manual or on the machine’s specification label. Write these values down. They are your diagnostic baseline — you are testing whether the machine delivers what it was designed to deliver.
Also note the pump type (axial cam or triplex), the pump brand (many OEM pumps are made by AR (Annovi Reverberi), General Pump, Comet, or Cat Pumps regardless of the pressure washer’s brand name), and the machine’s hours of use if known. A 200-hour machine showing 15 percent pressure loss is aging normally; a brand-new machine showing the same deficit has a manufacturing or assembly fault.
Step 2: Prepare the Machine and Water Supply
Connect a standard ¾-inch garden hose directly from your water tap to the machine’s inlet port — do not use a hose smaller than ¾ inch for testing because restricted inlet flow artificially depresses output pressure and produces a misleading low reading. Use the shortest garden hose practical for your test location; every additional 50 feet of garden hose reduces inlet pressure by approximately 2–3 PSI, which is negligible for residential tap pressures but worth noting.
Turn the water supply on fully and confirm water flows freely from the machine’s outlet port before connecting any attachments. This purges air from the system — air pockets in the pump or hose cause erratic pressure pulsations that produce unstable gauge readings.
For gas-powered pressure washers, verify that the engine oil level is correct and that there is adequate fuel before starting. Cold engines do not reach full operating RPM immediately, and a test taken while the engine is still warming up will read low. Allow at least 60 seconds of warm-up time before taking a pressure reading.
Step 3: Select and Install the Correct Test Nozzle
The nozzle orifice size directly controls the PSI reading on a pressure gauge. This is one of the most misunderstood aspects of pressure testing. A pressure washer pump generates pressure by forcing water through a restriction — the nozzle orifice creates that restriction. If the orifice is too large (worn nozzle), the pump encounters less resistance and PSI drops even though the pump itself is functioning perfectly. If the orifice is too small (wrong nozzle), PSI reads artificially high.
For accurate pressure testing, use the nozzle size recommended by the manufacturer for your machine’s rated GPM output. Nozzle orifice size is typically specified in thousandths of an inch (e.g., 4.0, 4.5, 5.0) or as a four-digit code where the first two digits represent the spray angle and the last two represent the orifice size (e.g., 2504 = 25-degree nozzle, size 04 orifice). This specification is listed in your owner’s manual or on the manufacturer’s nozzle selection chart.
If your nozzle is visibly worn, discolored, or has been in use for more than two seasons, replace it before testing. A worn nozzle will produce a systematically low pressure reading that incorrectly implicates the pump.
Step 4: Connect the Inline Pressure Gauge
Thread the inline pressure gauge onto the high-pressure outlet port of the machine using appropriate adapters (M22 male fitting for most consumer machines, 3/8-inch NPT for professional-grade units). Apply PTFE thread seal tape to male threads before connection to prevent micro-leaks at the fitting that would affect reading accuracy. Hand-tighten plus a quarter-turn with a wrench is the appropriate torque for most gauge fittings — do not over-tighten, as this damages the brass fitting threads.
Connect the spray gun to the outlet side of the gauge, then attach the extension wand and the appropriate test nozzle to the gun. The complete assembly from outlet port to nozzle should be: machine outlet → inline gauge → high-pressure hose → spray gun → wand → nozzle.
Step 5: Start the Machine and Stabilize Operation
Start the machine according to its normal startup procedure (see your owner’s manual). For electric models, turn the switch on. For gas models, start the engine and allow full warm-up to rated RPM. On gas machines with a throttle control, ensure the throttle is set to the full-throttle position — testing at partial throttle produces artificially low PSI readings that do not reflect the pump’s true capability.
Before taking a formal reading, squeeze the trigger and run the machine for 30–60 seconds to allow the system to reach thermal and hydraulic equilibrium. Initial pressure readings on cold machines can be 50–100 PSI below stabilized operating pressure, particularly on axial cam pumps where the oil viscosity thickens slightly in cold conditions.
Step 6: Take and Record the Pressure Reading
With the machine running at full throttle and the trigger pulled to full-flow position, observe the pressure gauge needle and allow it to stabilize. On a healthy machine, the needle will settle quickly and hold a consistent reading with minor oscillation of no more than ±25–50 PSI. Record the stabilized reading.
Take three separate readings over a 2–3 minute period, recording each value. Average the three readings for your confirmed test result. This eliminates the effect of any momentary fluctuation from pulsation dampening, valve chatter, or temporary supply pressure variation.
Compare your averaged reading against your machine’s rated PSI specification. Use these benchmarks:
- 95–100% of rated PSI: Excellent — machine is performing at design specification
- 85–95% of rated PSI: Good — normal wear-related reduction, acceptable for continued operation
- 75–85% of rated PSI: Below specification — investigation recommended, early wear or minor fault
- 60–75% of rated PSI: Significant pressure loss — pump or system fault present, repair warranted
- Below 60% of rated PSI: Severe pressure failure — pump, unloader, or major component fault
Step 7: Test With a Known-Good Nozzle for Comparison
After recording your initial test reading with the manufacturer-specified nozzle, install a brand-new nozzle of the same size and repeat the test. If pressure improves significantly (more than 100 PSI), your original nozzle was worn and the apparent pressure loss was a nozzle problem, not a pump problem. This simple substitution test prevents the common and expensive mistake of replacing a pump when the real fault is a $5 nozzle.
Step 8: Measure GPM (Optional but Recommended)
For a complete performance profile, measure GPM output after completing PSI testing. Disconnect the pressure gauge, remove the nozzle, and hold the open wand over a 5-gallon bucket. Time how long it takes to fill the bucket to the 5-gallon mark while the machine runs at full throttle. Divide 5 (gallons) by the time in minutes (e.g., 2 minutes = 2.5 GPM). Compare to your machine’s rated GPM.
Low GPM with near-normal PSI suggests a water supply restriction (undersized hose, low tap pressure, or blocked inlet filter). Low PSI with near-normal GPM suggests a pump valve problem or unloader valve fault that is bypassing pressure but not restricting flow. Both low PSI and low GPM together suggest pump wear, a cracked pump head, or major bypass leakage.
Diagnosing Pressure Loss Based on Test Results
Low PSI With Normal GPM: Unloader Valve or Pump Valve Issue
The unloader valve (also called a pressure regulating valve) is a spring-loaded bypass valve that diverts water back to the pump inlet when the trigger is released. A worn, stuck, or incorrectly adjusted unloader valve can partially bypass water even when the trigger is pulled, reducing output PSI while maintaining reasonable GPM. Testing with the gauge while adjusting the unloader valve’s adjustment knob or spring tension will show whether PSI rises when bypass is reduced.
Pump check valves (also called inlet and outlet valves or poppet valves) are small spring-loaded valves inside the pump manifold that control one-way water flow through each cylinder. Worn, corroded, or debris-fouled check valves allow water to leak back through the system during the compression stroke, reducing peak PSI while the overall flow rate remains relatively unaffected. Check valve kits are available for most pump brands including AR pumps, Cat Pumps, General Pump, and Comet pumps and are a common first-line repair for PSI loss in commercial machines.
Low PSI and Low GPM Together: Pump Wear or Inlet Restriction
When both pressure and flow are simultaneously low, begin diagnosis at the inlet supply side before assuming pump failure. A clogged inlet filter screen, a kinked garden hose, or inadequate tap water pressure (below 20 PSI static) will starve the pump of water, causing simultaneous PSI and GPM reduction. Clean or replace the inlet filter, use a shorter and larger-diameter garden hose, and confirm tap pressure before proceeding to internal pump diagnosis.
If the water supply is confirmed adequate and both PSI and GPM remain low, worn pump plungers, degraded packing seals, or a cracked pump cylinder are likely causes. At this stage, professional pump inspection or replacement pump assembly procurement is appropriate.
Pressure Fluctuates or Pulses: Air Entrainment or Valve Chatter
If the pressure gauge needle oscillates rapidly or the pressure cycles up and down with a rhythmic pulsation during the test, air entrainment in the pump is the most common cause. Air enters the system through a loose or leaking inlet fitting, a cracked inlet hose, or a worn pump seal that allows air ingestion on the suction stroke. Running the machine with the trigger pulled for 60–90 seconds often purges incidental air. If pulsation persists, inspect all inlet connections and seals.
Valve chatter — a rapid pressure oscillation with an audible clicking from the pump — indicates worn or debris-fouled check valves that are not seating cleanly between pressure cycles. This is distinct from the steady pulsation of air entrainment and typically requires check valve inspection and replacement.
Common Tools Used by Professionals to Test Pressure on a Pressure Washer
| Tool | Type | Typical Price Range | Best For |
|---|---|---|---|
| Glycerin-filled analog gauge (0–5,000 PSI) | Inline / mechanical | $15 – $45 | General field testing, all machine types |
| Digital pressure gauge | Electronic | $40 – $120 | Laboratory-quality readings, low pulsation |
| Pressure washer diagnostic gauge kit | Kit with adapters | $25 – $65 | Multi-brand technicians, quick setup |
| Unloader valve test gauge | Specialized inline | $30 – $80 | Diagnosing unloader valve bypass pressure |
| Flow meter (GPM meter) | Inline flow device | $35 – $90 | Combined PSI+GPM diagnostic sessions |
| Nozzle orifice gauge set | Mechanical drill bit set | $10 – $25 | Checking worn nozzle orifice dimensions |
| Pressure calibration tester | Bench-mount device | $150 – $400+ | Workshop pump rebuild verification |
Benefits of Regular Pressure Testing on a Pressure Washer
Many pressure washer owners only think about pressure testing after they have noticed a cleaning performance problem. This reactive approach means that by the time testing confirms a fault, the damage has been progressing for weeks or months. Incorporating routine pressure testing into a scheduled maintenance program delivers concrete operational and financial benefits.
Early fault detection prevents minor component wear from becoming major pump failures. A check valve that is just beginning to leak will show a 5–10 percent PSI reduction on a gauge long before it causes enough pressure loss to affect cleaning performance noticeably. Replacing a check valve kit costs $15–$40. Replacing the entire pump because a neglected valve failure allowed debris ingestion into the cylinder costs $150–$600.
Performance verification after repairs confirms that a replaced unloader valve, new pump seals, or rebuilt check valves have actually restored the machine to specification before returning it to work. Without a post-repair pressure test, you are assuming the repair was correct — testing confirms it objectively.
Baseline documentation at machine purchase or initial commissioning gives you a reference standard to compare against in all future tests. Record the date, machine hours, gauge used, nozzle size, water supply pressure, ambient temperature, and the PSI reading. This creates a performance history that makes trend analysis possible over the machine’s life.
Rental and commercial fleet management benefit enormously from regular pressure testing. Rental companies that pressure-test every machine after return and before re-rental catch abuse damage early, prevent customers from receiving underperforming equipment, and document machine condition for damage liability purposes.
Common Mistakes When Testing Pressure on a Pressure Washer
Testing with a worn nozzle: As explained in the procedure section, a worn nozzle orifice is the single most common cause of falsely low pressure readings. The nozzle is the restriction that creates back-pressure — enlarge the orifice and PSI drops, even on a perfect pump. Always verify or replace the test nozzle before drawing any conclusions from a low reading.
Testing before the engine reaches full RPM: Gas pressure washers driven by Honda GX series engines, Briggs & Stratton 900 series engines, or Kohler SH series engines all produce maximum pump output only at full governed RPM (typically 3,400–3,600 RPM for residential engines, 3,600 RPM for professional models). Testing during warm-up, with the throttle at half position, or with a governor spring problem will produce systematically low readings. Confirm full-throttle operation before reading.
Testing through a long, undersized hose: The garden hose connecting your tap to the machine’s inlet must supply adequate flow. Running a pressure test through a ½-inch diameter garden hose, or through 100+ feet of standard hose, restricts inlet flow sufficiently to reduce output pressure. Use a ¾-inch diameter hose of 50 feet or less for accurate baseline testing.
Not sealing gauge threads properly: Even a small thread leak at the gauge fitting bleeds enough pressure to produce a reading 50–200 PSI below actual output. Always use PTFE thread tape on male NPT threads before connection. Do not use thread tape on O-ring face seal (ORFS) fittings — these seal on the O-ring face and thread tape on these fittings causes over-compression and fitting damage.
Testing with the unloader valve adjusted incorrectly: The unloader valve has an adjustment mechanism (typically a spring and knob or set screw) that sets the pressure at which it diverts flow back to the inlet. If someone has previously adjusted this valve to a lower pressure setting than the factory specification, your test will read low even though the pump is capable of full pressure. Before concluding there is a pump fault, verify the unloader valve is set to factory specification per the service manual.
Comparing to maximum rated PSI instead of expected working PSI: Manufacturer-rated PSI is a peak figure measured under controlled laboratory conditions. Expecting to read exactly the rated value at the spray gun under field conditions is unrealistic. As noted earlier, 85–95 percent of rated PSI at working conditions is normal for a well-maintained machine. Users who test their machine, find it reading 2,700 PSI when rated at 3,000 PSI, and conclude something is wrong are diagnosing a healthy machine incorrectly.
Using a gauge with an insufficient pressure range: A gauge rated for 0–2,000 PSI used to test a machine rated at 3,000 PSI will be driven into the mechanical stop at the top of its range, damaging the gauge and producing no useful data. Always use a gauge with a maximum range at least 20 percent above your machine’s rated PSI. A 0–5,000 PSI gauge is appropriate for testing any residential or commercial pressure washer up to 4,000 PSI.
Reading the gauge while the trigger is released: Some users read the gauge while the trigger is in the hold position (trigger released but gun still connected). This reads the static bypass pressure maintained by the unloader valve, not the working output pressure. The only meaningful pressure reading is taken with the trigger fully depressed and the machine running at full speed.
Frequently Asked Questions
How do I test the pressure on a pressure washer without a gauge?
Testing the pressure on a pressure washer without a dedicated pressure gauge is an approximate method that cannot give you a PSI figure — it can only tell you whether the machine is delivering noticeably less force than expected. A common informal test is the pencil test: hold a permanent marker or pencil approximately 6 inches from the spray at the 0° nozzle position and observe whether the stream deflects or marks the object sharply. More practically, test the machine on a known surface — if a concrete driveway that previously required a single slow pass now requires multiple passes to clean, pressure has dropped measurably. For any meaningful diagnostic purpose, an inline pressure gauge ($15–$45) is essential. Informal observation cannot confirm a 15 percent pressure reduction that is sufficient to warrant pump service.
What PSI should I expect when testing the pressure on a pressure washer that is brand new?
When testing the pressure on a brand-new pressure washer, you should expect to measure 90–100 percent of the manufacturer’s rated PSI under proper test conditions — correct nozzle size, adequate water supply, full engine throttle, and machine at operating temperature. Some new machines read slightly above their rated specification during initial hours of operation because components are not yet worn to their running clearances. If your brand-new machine tests below 85 percent of rated PSI out of the box, check the nozzle size first (wrong nozzle is common in out-of-box testing), then inspect the unloader valve setting, and contact the manufacturer’s warranty support if the issue persists after ruling out setup errors.
How often should I test the pressure on a pressure washer?
For residential pressure washers used seasonally, testing the pressure on a pressure washer once at the beginning of each season (spring commissioning) and once after any repair is a practical schedule. This gives you a seasonal baseline and confirms post-repair success without excessive testing overhead. For commercial pressure washers operating under daily or near-daily use, a pressure test every 50–100 operating hours aligns with most manufacturer service interval schedules and catches developing pump wear at a stage where it is still economically repairable. Rental fleet machines should be pressure-tested after every return.
Can I test the pressure on a pressure washer using its spray pattern as an indicator?
The spray pattern can provide visual clues but does not constitute a reliable pressure test on a pressure washer. A healthy pressure washer produces a clean, sharp-edged spray fan with a distinct boundary and no irregular streamers or droplet scatter within the pattern. A worn nozzle orifice typically produces a fan with ragged edges and droplet scatter at the periphery. A partially blocked nozzle produces an asymmetric fan skewed to one side. While these visual indicators suggest potential problems, they cannot quantify PSI loss or reliably distinguish between a nozzle fault, pump fault, or supply restriction. Pattern observation is a useful pre-test screening step, not a substitute for gauge-based pressure measurement.
Does hose length affect the results when I test the pressure on a pressure washer?
Yes, hose length affects results when you test the pressure on a pressure washer, but the effect is more significant on the supply (inlet) side than on the discharge (outlet) side. Each 50 feet of standard ¾-inch garden hose reduces water supply pressure by approximately 2–3 PSI — minor for baseline water pressures of 40–80 PSI but meaningful if your supply pressure is already marginal (below 25 PSI). On the discharge side, high-pressure hose friction losses are very small relative to the 1,000–4,000 PSI operating pressure range — a standard 25-foot high-pressure hose introduces less than 10 PSI of friction loss at typical residential flow rates. For standardized testing, use the same garden hose length and the machine’s stock high-pressure hose to ensure comparability between tests over time.
What should I do if the pressure test on my pressure washer shows normal PSI but cleaning is still poor?
If a pressure test on your pressure washer confirms normal or near-normal PSI but cleaning performance is unsatisfactory, the issue is almost certainly GPM (flow rate) related rather than pressure related. A machine can maintain full PSI while delivering reduced water volume if the inlet filter is partially blocked, the pump intake valves are partially worn, or the water supply tap cannot provide adequate flow. Reduced GPM means fewer Cleaning Units overall even with normal PSI. Measure your GPM as described in the procedure section, inspect and clean the inlet filter screen, and confirm your garden tap delivers at least 1.5–2 GPM more than your machine’s rated GPM requirement. Additionally, check whether the unloader valve bypass rate has increased — a valve that bypasses more water than normal at working pressure reduces effective GPM at the nozzle while maintaining apparent PSI at the gauge.
How do I test the pressure on a pressure washer pump specifically, separate from the output at the wand?
Testing the pressure on a pressure washer pump specifically — as opposed to the total system output — requires connecting the pressure gauge directly to the pump’s high-pressure outlet port rather than at the end of the hose assembly. This measurement, taken without the high-pressure hose and gun in the test circuit, shows the pump’s raw output before any downstream losses. Comparing this pump-direct reading against the full-system reading (gauge at the gun end) quantifies the friction losses from your hose and fittings. On a well-configured system, this difference should be minimal (under 20 PSI). A large difference between pump-direct PSI and gun-end PSI indicates a restricted high-pressure hose, partially blocked quick-connect fitting, or undersized extension wand as the pressure loss source rather than the pump itself. This two-point measurement technique is standard practice in professional pressure washer service.
Is testing the pressure on a pressure washer the same for electric and gas models?
The fundamental gauge connection procedure for testing the pressure on a pressure washer is identical for electric and gas models — the gauge connects between the pump outlet and the spray gun in the same way regardless of the power source. The operational differences during testing are significant, however. Gas models must be tested at full governed throttle (3,400–3,600 RPM) and after a 60-second warm-up period to ensure accurate readings. Electric models should be tested only after confirming the supply voltage at the outlet is within specification (120V ±10% for North American machines) — a low-voltage supply reduces motor speed and pump output simultaneously, producing a deceptively low reading that clears entirely when voltage is corrected. Electric models should also be tested through a GFCI outlet of adequate amperage rating (typically 15A or 20A) to prevent nuisance tripping during the test that interrupts the reading.
Conclusion
Learning how to test the pressure on a pressure washer puts objective data where guesswork used to be. With an inline glycerin-filled pressure gauge, the correct test nozzle, an adequate water supply, and your machine’s rated specification as a baseline, you can confirm in under ten minutes whether your machine is performing at design capability or whether a fault is robbing it of output. The diagnostic framework is straightforward: compare your measured PSI against the rated specification, interpret the deficit using the benchmark ranges provided, and follow the diagnostic pathway that matches your specific symptom pattern. Whether the fault turns out to be a $5 worn nozzle, a $30 check valve kit, or a $200 pump rebuild, the pressure test tells you where to look — and equally importantly, it tells you where not to look, saving you money on parts you never needed.