
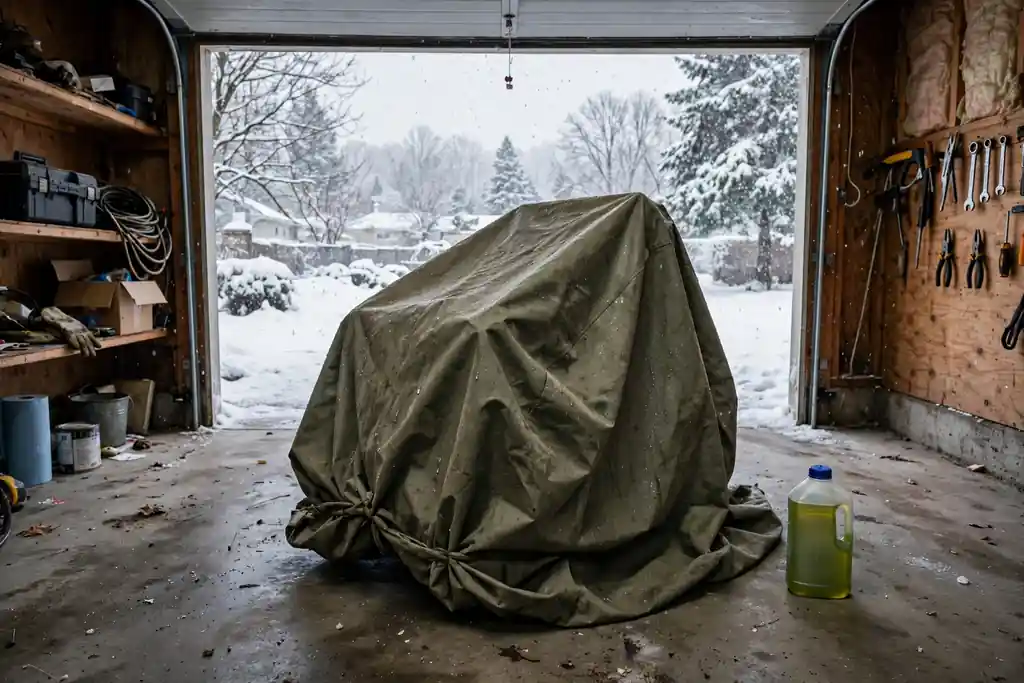
Winterizing a pressure washer means draining all water from the pump, hoses, and internal components, then adding pump protector antifreeze lubricant to coat seals and internal surfaces before storing the machine in a location where temperatures will not drop below freezing — preventing cracked pump heads, burst hoses, and destroyed seals caused by water expanding as it freezes.
When water freezes inside a pressure washer pump, it expands by approximately 9 percent in volume. That expansion has nowhere to go inside the tightly machined chambers of a triplex pump or axial cam pump, so it fractures pump heads, blows out ceramic plunger seals, cracks manifolds, and splits high-pressure hose linings. The damage is rarely covered under warranty because manufacturers classify freeze damage as owner negligence. A single neglected winterization can turn a $400 machine into an expensive paperweight overnight.
This guide covers exactly how to winterize a pressure washer — whether it runs on electricity or gasoline, whether it sits in a heated garage or an unheated shed — so you can confidently protect your investment before cold weather arrives.
Why Winterizing a Pressure Washer Is Non-Negotiable
Many homeowners store their pressure washers after the last fall cleaning job without giving the machine a second thought. This is the single most common and costly mistake in pressure washer ownership. The problem is not the cold air temperature in the storage location — it is the residual water that remains trapped inside the pump cylinder, pump head, unloader valve, inlet manifold, outlet manifold, spray gun, extension wand, and the inner lining of the high-pressure hose even after the machine has been drained by hand.
Even a small amount of water left inside a pump — a few teaspoons is enough — can cause catastrophic freeze fractures. Unlike a garden hose that simply cracks at the surface, a pressure washer pump is a precision-machined component with tolerances measured in thousandths of an inch. Freeze expansion in those tight spaces destroys the component permanently. Replacement pump assemblies for mid-range machines from brands like Simpson, Generac, Sun Joe, Ryobi, or Karcher typically cost between $80 and $300, while a professional pump rebuild on a commercial unit from Landa, Hotsy, or Mi-T-M can exceed $600.
Proper winterization costs less than $10 in materials and takes under 20 minutes. The math is straightforward.
Understanding What Freezes and Why It Matters
The Pressure Washer Pump
The pump is the component most vulnerable to freeze damage. Inside a triplex plunger pump or axial cam pump, water passes through precisely engineered inlet valves, outlet valves, ceramic plungers, and pump seals (also called packing seals). These components fit together with almost no clearance. Residual water in these passages freezes, expands, and the force shatters the pump body or presses seals out of their seats permanently.
Axial cam pumps, found in most consumer-grade and mid-range electric and gas pressure washers, are particularly vulnerable because their internal passages are narrower and the pump body is often made from aluminum alloy, which transmits cold temperature rapidly and provides minimal resistance to freeze expansion forces.
Triplex pumps, used in professional and commercial machines, have a more robust brass or stainless steel manifold but are equally susceptible to freeze damage if water is left inside. The higher cost of these components makes winterization even more economically critical on commercial equipment.
The High-Pressure Hose
High-pressure hoses on pressure washers are constructed with a rubber or thermoplastic inner core, a steel wire braid reinforcement layer, and an outer protective jacket. Water trapped in the inner core can freeze and crack the lining, which then allows high-pressure water to migrate between layers during future operation — a condition called hose delamination that causes hose failure and dangerous blowouts at the coupling connections.
Spray Gun, Wand, and Nozzle Tips
The trigger gun assembly contains a small internal valve and water passages that can crack if water freezes inside them. Quick-connect fittings (also called QC couplers) and nozzle orifices are small and trap water easily. These components are inexpensive to replace individually but collectively add up to significant cost if all are damaged in a single freeze event.
What You Need to Winterize a Pressure Washer
Before starting the winterization process, gather the following supplies and materials:
| Item | Purpose | Where to Find |
|---|---|---|
| Pump protector / pump saver | Lubricates and antifreeze-coats internal pump components | Hardware stores, Amazon, manufacturer websites |
| Fuel stabilizer (gas models only) | Prevents fuel degradation and carburetor gumming in storage | Auto parts stores |
| Clean water supply | Final flush to remove detergent residue before shutdown | Garden tap |
| Engine oil (if due for change) | Fresh oil prevents acid buildup from fuel combustion byproducts | Auto parts stores |
| Spark plug (optional) | Cylinder fogging oil application point on gas models | Auto parts stores |
| Fogging oil / storage oil (optional) | Protects cylinder walls of gas engine from corrosion | Auto parts stores |
| Dry storage bags or covers | Protects exterior during storage | Hardware stores |
Popular pump protector products used by professionals and homeowners include Briggs & Stratton Pump Saver, AR Blue Clean Pump Protector, Simpson Cleaning Pressure Washer Pump Protector, Generac Pump Saver, and WD-40 Specialist Pressure Washer Pump Treatment. All function similarly — they inject a non-toxic antifreeze and lubricant solution through the pump internals using a pressurized aerosol can.
How to Winterize a Pressure Washer: Step-by-Step Guide
Step 1: Flush Out All Detergent From the System
If you used a detergent, degreaser, or cleaning chemical during your last cleaning session, you must flush the chemical completely from the system before storing the machine. Detergent residues left in the chemical injector, detergent hose, and pump internals degrade rubber seals and O-rings over the storage period, leaving the pump compromised before the next season even starts.
Connect your garden hose, turn the water on fully, select a rinsing nozzle (green 25° or white 40°), and run the machine at low pressure for at least 60–90 seconds with the detergent supply valve turned off or the siphon hose removed from the detergent container. This draws clean water through every internal passage and flushes all chemical residue out through the nozzle. Do not skip this step even if you believe only a small amount of soap was used.
Step 2: Drain the Water Supply and Purge the Hose System
Turn off the garden hose water supply. With the machine still running, squeeze the trigger gun and hold it open until the water flow from the nozzle reduces to a trickle and stops completely. This pulls the remaining pressurized water out of the high-pressure hose and the pump’s outlet passages.
Release the trigger, turn off the machine (motor or engine), and then squeeze the trigger one final time to release any residual pressure trapped between the pump outlet and the trigger valve. This is an important step that many users skip — residual pressure keeps water trapped in the system under tension, and releasing it allows gravity to drain more effectively.
Disconnect the garden hose from the inlet port. Tilt the machine so the water inlet port faces downward and allow gravity to drain any water remaining near the inlet. Remove the nozzle tip from the wand, hold the wand downward, and allow any remaining water to drip out. Disconnect the high-pressure hose from both ends (machine outlet and gun connection) and hold both ends down to drain completely.
Step 3: Apply Pump Protector (Antifreeze Lubricant)
This is the most critical step in the entire winterization process. Pump protector (also called pump saver) products come in a pressurized aerosol can with a nozzle designed to fit directly into the water inlet port of the pressure washer pump.
Insert the nozzle of the pump protector can into the water inlet port. Hold the machine so the outlet is lower than the inlet if possible. Spray the pump protector according to the manufacturer’s directions — typically a 5–10 second burst. You will see the milky-white or orange-tinted liquid emerge from the high-pressure outlet port and sometimes from the unloader valve bypass port when sufficient coverage has been achieved.
The pump protector solution contains a combination of propylene glycol antifreeze (which is non-toxic and safe for sewers and ground contact), lubricating oil, and corrosion inhibitors. The propylene glycol displaces residual water from all internal passages and lowers the freeze point of any remaining moisture to well below -30°F (-34°C) in most formulations. The lubricating oil coats the ceramic plungers, valve seats, and pump seals to prevent them from drying out, cracking, or sticking together during months of non-use.
Do not substitute automotive antifreeze (ethylene glycol) for dedicated pump protector products. Ethylene glycol-based automotive antifreeze is toxic to humans, pets, and wildlife, and will degrade the specific rubber seal compounds used in pressure washer pumps.
Step 4: Winterize the Gas Engine (Gas Models Only)
If you are winterizing a gas-powered pressure washer, the engine requires its own set of storage preparations entirely separate from the pump.
Add fuel stabilizer (such as STA-BIL 360 Protection, Star Tron Enzyme Fuel Treatment, or Sea Foam Motor Treatment) to the fuel tank according to the stabilizer product’s dosage instructions — typically 1 ounce per 1 gallon of fuel. Run the engine for 5–10 minutes after adding stabilizer to allow the treated fuel to circulate through the entire carburetor fuel circuit and fuel lines. This prevents the volatile light hydrocarbons in gasoline from evaporating and leaving behind the waxy, varnish-like deposits that clog carburetor jets and needle valves during storage.
Alternatively, if you prefer not to use fuel stabilizer, run the engine until it completely exhausts all fuel from the tank and carburetor (run it dry). While this avoids the varnish problem, it leaves the carburetor’s rubber diaphragm and fuel bowl O-rings exposed to air without any protective fuel film, which can cause them to shrink or crack over a long storage period. Using a quality fuel stabilizer is generally the preferred approach for storage periods longer than 60 days.
Change the engine oil before storage if the machine is due for an oil change per the engine manufacturer’s service schedule. Used engine oil contains combustion byproducts including acidic compounds that will slowly attack internal metal surfaces during storage. Fresh oil provides a cleaner, more protective film on crankshaft bearings, connecting rod bearings, and cylinder walls over the dormant winter period.
For extended storage (over 3 months), remove the spark plug and spray engine cylinder fogging oil (such as WD-40 Specialist Long-Term Corrosion Inhibitor or Sta-Bil Fogging Oil) directly into the spark plug hole. Slowly pull the recoil starter cord two or three times to distribute the fogging oil across the cylinder walls and piston rings. Reinstall the spark plug finger-tight. This prevents cylinder wall rust, which causes the piston rings to stick and makes engine startup difficult the following spring.
Step 5: Protect the Electric Motor (Electric Models)
Electric pressure washers do not have fuel systems or engine oil to manage, which makes their winterization considerably simpler. After applying pump protector to the pump, the primary concern for the electric model is moisture protection of the motor’s electrical components, carbon brushes (in brushed motor models), and winding insulation.
Store electric pressure washers in a location that stays above 32°F (0°C) if at all possible. If below-freezing storage is unavoidable, ensure the pump protector has been applied thoroughly and wrap the machine in a breathable storage cover (not an airtight plastic bag, which traps condensation against electrical components). Remove the power cord from the outlet and coil it loosely without tight bends that stress the conductor insulation over winter.
Brushless motor models (found in higher-end electric washers from EGO, Greenworks Pro, and Milwaukee) are more tolerant of storage conditions than brushed motor designs but still require the same pump winterization steps.
Step 6: Store All Accessories Properly
The spray gun, extension wand, nozzle tips, high-pressure hose, and detergent siphon hose all require proper storage attention. After draining and drying, place all nozzle tips into their dedicated storage case or pouch — loose nozzles stored in a toolbox get damaged, mixed up, or lost, and a damaged nozzle orifice delivers incorrect pressure performance the following season.
Coil the high-pressure hose in large-diameter loops (minimum 12-inch loop diameter) to avoid permanent kinking of the internal wire braid. Do not hang the hose over a single nail, which creates a sharp bend at the hanging point that eventually fractures the inner lining. Store the coiled hose flat on a shelf or hang it on a wide, smooth hook.
Step 7: Choose the Right Storage Location
The storage environment matters as much as the winterization procedure itself. The ideal storage location for a winterized pressure washer is:
- Dry — low humidity prevents corrosion of metal components and mold growth on rubber parts
- Frost-free — consistently above 32°F (0°C) even during the coldest nights
- Away from direct sunlight — UV exposure degrades rubber hoses, seals, and plastic housings over time
- Off the ground — storing on a shelf or pallet protects from floor moisture and potential water intrusion from flooding
If a heated storage space is not available and the machine must be stored in an unheated garage or shed, the pump protector antifreeze treatment is essential, not optional. Properly applied pump protector will protect the internals to approximately -30°F (-34°C) for most products, which covers virtually all residential climate scenarios in North America and Europe.
Winterizing an Electric vs. Gas Pressure Washer: Key Differences
| Task | Electric Pressure Washer | Gas Pressure Washer |
|---|---|---|
| Pump protector application | Required — same process | Required — same process |
| Fuel system treatment | Not applicable | Required — stabilizer or drain fuel |
| Engine oil change | Not applicable | Recommended before storage |
| Spark plug / fogging oil | Not applicable | Recommended for 3+ month storage |
| Carburetor protection | Not applicable | Critical — jets clog from varnish |
| Electrical cord storage | Loosely coiled, dry location | Not applicable |
| Overall complexity | Lower | Higher |
| Time required | 10–15 minutes | 20–35 minutes |
| Risk of freeze damage | Pump only | Pump + engine components |
Common Winterization Mistakes That Ruin Pressure Washers
Skipping pump protector and relying only on draining: Manual draining by running the machine until water stops flowing does not remove all internal moisture. Surface tension holds a film of water against metal and ceramic surfaces inside the pump, and this thin film is sufficient to cause freeze damage in a precision-machined component. Pump protector physically displaces this residual moisture with antifreeze chemistry — draining alone cannot replicate this.
Using the wrong antifreeze product: Standard automotive antifreeze (ethylene glycol-based, typically bright green or orange) is toxic and chemically incompatible with pressure washer pump seal materials. Always use pump-specific protector products containing propylene glycol, which is food-grade safe and chemically neutral with rubber seal compounds.
Forgetting to flush detergent before winterizing: Detergent residues left in the system over winter attack rubber O-rings, soften plastic components, and leave crystallized deposits that block the small orifices of the chemical injector and nozzle tips. This is easy to avoid with a 90-second clean-water flush before shutdown.
Leaving fuel in the tank without stabilizer: Untreated gasoline begins to degrade within 30 days of purchase. Over a 3–5 month winter storage period, unstabilized fuel oxidizes into a thick, gummy varnish that clogs the precision passages of the carburetor main jet, idle jet, and needle seat. A carburetor cleaning or rebuild adds $50–$200 to your spring startup costs — easily avoided with a $10 bottle of fuel stabilizer.
Storing with the trigger gun locked in a stressed position: Some users hang the spray gun by the trigger or store it with the trigger zip-tied open. This keeps the internal valve spring under constant compression for months, causing spring fatigue and premature valve failure. Store the trigger gun in its natural, trigger-released position.
Neglecting hose storage: Tightly coiling the high-pressure hose in small loops, hanging it over a single nail at a sharp angle, or leaving it outdoors where it will be stepped on or driven over during winter causes micro-fractures in the inner hose lining that are invisible externally but result in catastrophic hose failure under pressure the following season.
Forgetting the spray wand interior: The lance or wand is a simple piece of pipe, but water trapped inside it freezes and can split the aluminum or stainless steel tube. After disconnecting, hold the wand vertically with the nozzle connection end facing down and allow water to drain before storage.
Benefits of Proper Pressure Washer Winterization
Protecting your machine before cold weather has tangible, measurable benefits beyond simply avoiding freeze damage. A properly winterized and stored pressure washer:
- Starts reliably in spring — no carburetor cleaning, no stuck pump, no cracked manifold to diagnose
- Maintains full pressure output — worn or freeze-damaged pump seals cause pressure loss that many users misdiagnose as a nozzle problem
- Extends machine lifespan significantly — a well-maintained residential machine can deliver 10+ years of reliable service, while a neglected one typically fails within 3–5 seasons
- Preserves warranty validity — most manufacturer warranties explicitly exclude freeze damage; documented proper maintenance supports any warranty claim for unrelated failures
- Reduces spring preparation time — a properly stored machine is ready to use within minutes of reconnecting the water supply
Frequently Asked Questions
How do I winterize a pressure washer without pump saver?
Winterizing a pressure washer without dedicated pump saver is technically possible but not recommended for machines stored in environments that may reach freezing temperatures.
If pump protector is unavailable, flush all detergent from the system with clean water, drain as thoroughly as possible by running the machine until water flow stops, remove all attachments, and store the machine in a location that is guaranteed to remain above 32°F at all times.
This approach relies entirely on complete drainage without any antifreeze protection — any residual water in tight pump passages not fully drained may still cause freeze damage. A $8–$12 can of pump protector is strongly worth the insurance.
Can I winterize a pressure washer with RV antifreeze instead of pump saver?
Many operators ask whether RV antifreeze (pink-colored, propylene glycol-based antifreeze designed for drinking water systems) can substitute for dedicated pressure washer pump saver.
The active antifreeze chemistry is similar — both use non-toxic propylene glycol — and RV antifreeze will provide adequate freeze protection if drawn through the pump. However, dedicated pump saver products also contain lubricating oils and corrosion inhibitors specifically formulated for pump seal materials.
RV antifreeze provides antifreeze protection but lacks the lubrication and seal conditioning components. For a single season, RV antifreeze used in a pinch is acceptable; for long-term machine health, dedicated pump protector is the superior choice.
When should I winterize a pressure washer before winter?
The right time to winterize a pressure washer is after the last cleaning job of the season and before the first forecasted overnight temperature below 40°F (4°C) in your area — not 32°F, because pump temperatures can drop below freezing before ambient air does when the machine is stored on a cold concrete floor.
Do not wait for a freeze warning. If you live in a climate where temperatures can drop suddenly, complete your winterization in late October or early November as a standard annual maintenance task rather than waiting for a specific weather event.
Does winterizing a pressure washer damage the pump seals?
No — winterizing a pressure washer with a properly formulated pump protector product does not damage pump seals. In fact, the lubricating components in pump saver products actively condition and preserve rubber seals, preventing the drying and cracking that occurs when seals sit dry and unlubricated for months.
The propylene glycol antifreeze component in pump protectors is chemically compatible with all standard pressure washer pump seal materials including nitrile rubber, EPDM rubber, and Viton seals. Freeze damage without winterization is the cause of seal destruction, not the protection product itself.
How do I winterize a pressure washer that is stored in a heated garage?
If your pressure washer is stored in a heated garage that reliably stays above 40°F (4°C) throughout winter, you still need to flush detergent from the system and drain the water supply connection — but the critical pump protector antifreeze step becomes less urgent from a freeze-prevention standpoint.
However, applying pump saver is still recommended even for heated storage because the lubricating and corrosion-inhibiting components protect seals and internal metal surfaces during the dormant period regardless of temperature. The few minutes and minimal cost involved make it worthwhile regardless of storage conditions.
How do I winterize a pressure washer with a detergent tank?
When winterizing a pressure washer with an integrated onboard detergent tank, drain the detergent completely from the tank and dispose of it according to the detergent manufacturer’s instructions. Rinse the detergent tank with clean water.
Remove and clean the detergent siphon tube and inline filter (if present) inside the tank intake. Run clean water through the machine’s chemical injection system for 60–90 seconds with the siphon tube placed in a bucket of clean water to flush chemical residue from the injector venturi, chemical metering valve, and all downstream passages before completing the standard winterization procedure.
What happens if I don’t winterize a pressure washer properly?
Failing to properly winterize a pressure washer in a cold climate typically results in one or more of the following: a cracked pump head or manifold (replacing the entire pump assembly), destroyed pump seals causing complete pressure loss on first spring use, split high-pressure hose requiring full hose replacement, broken trigger gun internals, or a stuck carburetor on gas models requiring professional cleaning or carburetor rebuild.
The combined cost of these freeze-related failures on a mid-range residential gas pressure washer can range from $150 to over $500 — often approaching or exceeding the machine’s original purchase price.
How do I winterize a pressure washer for the first time with no experience?
For first-time winterization of a pressure washer with no prior experience, the process is straightforward: flush the detergent from the system by running clean water through for 90 seconds, then run the machine until water stops flowing from the nozzle.
Turn it off and release trigger pressure. Disconnect the garden hose. Insert the nozzle of a pump saver aerosol can (such as Briggs & Stratton Pump Saver) into the water inlet and spray for 5–10 seconds until fluid exits the outlet port.
For gas models, add fuel stabilizer to the tank, run for 5 minutes, then change the oil. Drain and store all accessories. The entire process takes under 20 minutes and requires no mechanical skill beyond basic hose connections.
Conclusion
Winterizing a pressure washer is the single most important maintenance task you will perform on this machine all year. The entire process — flushing detergent, purging water, applying pump protector, treating the fuel system on gas models, and storing accessories properly — takes less than 30 minutes and costs under $20 in materials.
That small investment protects a machine worth hundreds of dollars and ensures it starts, pressurizes, and performs exactly as expected when spring cleaning season arrives.
Whether you own a compact Sun Joe electric pressure washer for weekend use or a professional Simpson gas pressure washer for commercial jobs, the winterization fundamentals are the same and the consequences of skipping them are equally unforgiving.